| How to Run a Magtek POS Transaction |
The Magtek POS terminal is used to run payments, or transactions. |
| Step 1 |
Using IE8 (Internet Explorer 8), launch VPS: https://agency.vitalchek.com/vpsweb2/ |
| Step 2 | |
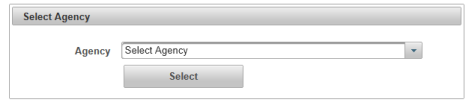
| Step 3 |
Select appropriate Location from the Select Agency list (if displayed) |
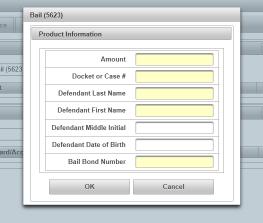
| Step 4 |
The Payment Screen displays 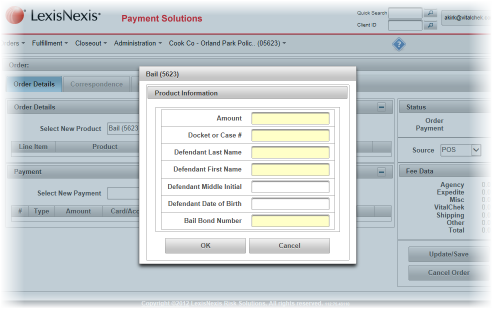
|
| Step 5 |
Enter all information in the Payment screen (required fields are shaded in yellow)
|
| Step 6 |
Click OK button to accept the information
|
| Step 7 |
Order Details tab is displayed, click the Add button to display the Payment Details screen
|
| Step 8 |
Swipe a card through the Magtek Card Reader.
Note: If the Error Reading Card Data message appears, the card is damaged and cannot be read. Card information must be entered into the payment screen manually.
|
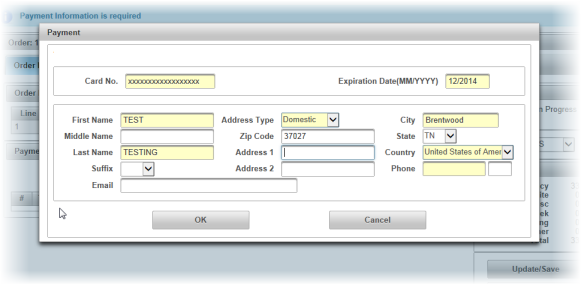
| Step 9 |
Card information populates in the Payment Screen
|
| Step 10 |
Enter a phone number in the Phone field (use the USB keypad if present)
|
| Step 11 |
Click the OK button to add card information to the order
|
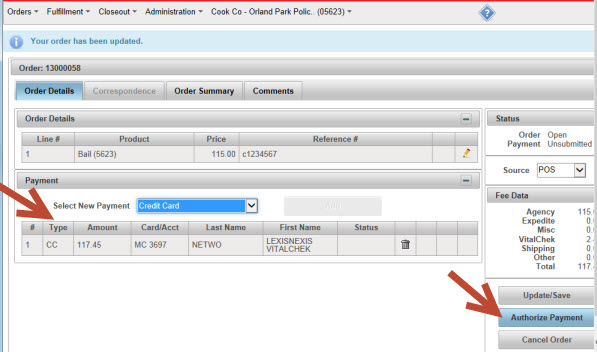
| Step 12 |
The Payment section should now display a line item and the Authorize Payment button displays
|
| Step 13 |
Click the Authorize Payment button to complete the transaction |
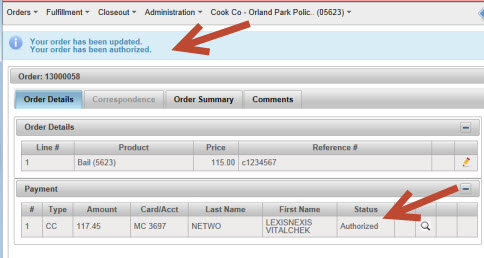
| Step 14 |
Two messages display below the menu bar stating that the order has been updated and authorized. The payment line item status now displays Authorized. The transaction is now complete.
|
| Step 15 |
After authorizing the payment, click the Print Receipt button
|
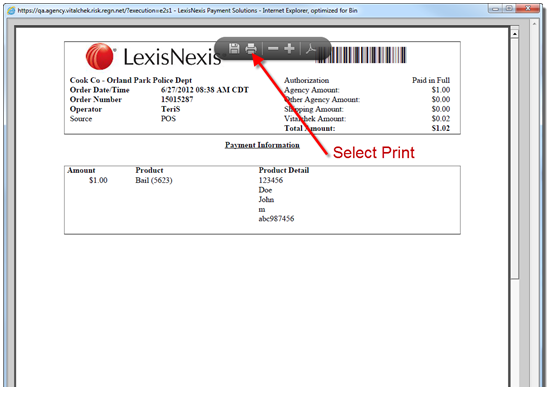
| Step 16 |
The receipt will generate and display in an Adobe Reader popup window. Click the Print icon and print to the appropriate printer.
|
| Step 17 |
Click the Print icon and print to the appropriate printer
|