


| How to Enter Death Certificate Data | Information about the certificate(s) is entered into the Certificate Data section. Required fields are shaded in yellow. |
|
|
|
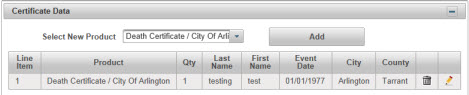
| Step 1 |
Select a Death Certificate option from the Select New Product drop down list that displays available certificates for the selected Agency Note - Agencies that offer only 1 product will default to the available product
|
| Step 2 |
Click Add button
|
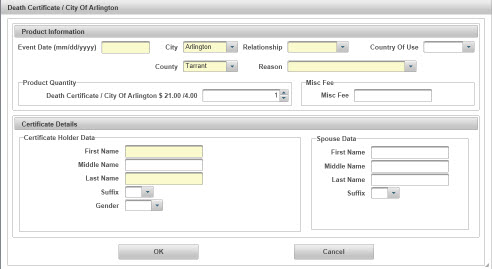
| Step 3 |
Death Certificate page displays
|
| Step 4 |
Enter Event Date in mm/dd/yyyy format. This is the date that the event listed on the certificate occurred
|
| Step 5 |
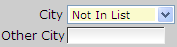
Select City from the drop down list. This is the city where the event occurred
Note: If the city where the event occurred is not in the list, select Not in List option. Other City field is displayed. Type the Other City name
If the applicant does not know the city where the event occurred, select Not in List and enter County (step 6) |
| Step 6 |
Select County from the drop down list. This is the county where the event occurred.
|
| Step 7 |
Select Relationship from the drop down list. This is the relationship between the the person who is ordering the certificate ("Applicant") and the person who is listed on the certificate ("Certificate Holder")
|
| Step 8 |
Select the Reason for the order from the drop down options
|
| Step 9 |
Country of Use is only required when the Applicant is requesting an Apostille. Select the county that the Apostille is being used for from the drop down list
|
| Step 10 |
Enter the Product Quantity, (number of certificates)
|
| Step 11 |
Enter Certificate Holder Data, starting with the First Name of the person that is listed on the certificate
|
| Step 12 |
Enter the First Name of the person listed on the certificate
|
| Step 13 |
Enter the Middle Name (if required) of the person listed on the certificate
|
| Step 14 |
Enter the Last Name of the person listed on the certificate
|
| Step 15 |
Select a suffix from the drop down list
|
| Step 16 |
Select Male or Female from the Gender drop down list
|
| Step 17 |
Enter Spouse Data, (if applicable) 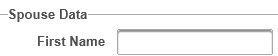
|
| Step 18 |
Enter the Spouse's Middle Name (if applicable/required)
|
| Step 19 |
Enter the Spouse's Lasts Name (if applicable)
|
| Step 20 |
Select a Suffix for the Spouse
|
| Step 21 |
Click OK to continue order; Cancel to cancel product information
|


 See Also
Orders
Certificate Data